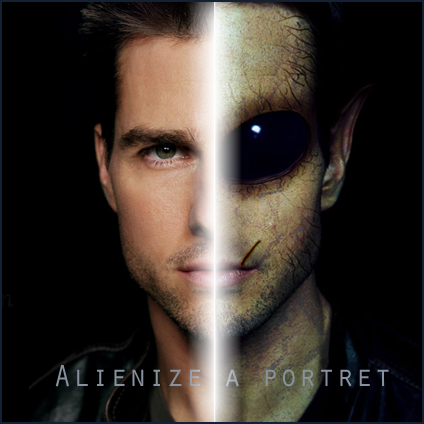
- Go to File > New (Ctrl+N) to create a new file. Make sure that you have your background settings to Transparent. Now search for a portrait on your PC to use and add it to your newly created file. For this tutorial I used a picture of Tom Cruise to alienize (Source file
 ). Ofcourse you can use a picture of your friend, a family member or even yourself.
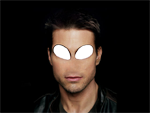
- Grab the Eraser Tool (E) and erase the eyes. Now use the Clone Stamp Tool (S) to clone parts of the cheeks over the nose. It'll look like the nose is erased. Use the Healing Stamp Tool to fix any not natural looking parts on the place where the nose first was.
- Go to Filter > Liquify Tool (Shift+Ctrl+X) and a new window will show. Use the Forward Warp Tool (W) in this window to strech out the empty place where the eyes first were. I used a brush with a size of approxamitely 30 pixels. Strech it untill it has the shape of an alien eye. Press OK to accept the changes.
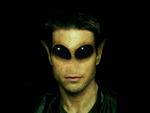
- I used some alien eyes that I created before (Source file
 ) and pasted them in the layer behind the face. Scale the eye using Transform (Ctrl+T) untill it's at a right size. Use the Burn Tool (O) to make the areas around the eyes a little bit darked so it will look more realistic.
- Open up the liquify tool by going to Filter > Liquify Tool (Shift+Ctrl+X). Again, use the Forward Warp Tool (W) and strech out the ears. This time I used a brush with a size of 90. Press OK to save the changes and if you want, use the Burn Tool (O) to darken parts of the ears.
- Get ready to change some colours using Color Balance (Ctrl+B). Play around with the Color Balance and Tone Balance untill you think you have something alien-like. I used these settings:
- Shadows: 0,20,0
- Midtones: 0,20,0
- Highlights: 0,40,0
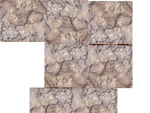
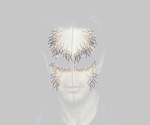
- Grunge your face. You can use several options for this, for example you could use a grunge brush. Here I used a pattern that I had on my PC (Source file
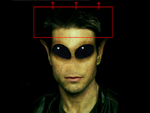
 ). On a new layer, cover the face with the whole grunge pattern using Transform (Ctrl+T) or copy-pasting the pattern next to eachother (See left image below). Set the Blending Mode of the grunge layer to Color Burn and the Opacity around 25%.
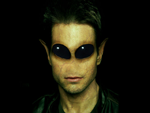
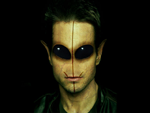
- Use the Rectangular Marquee Tool (M) and select the forehead of the face (See left image below). Duplicate layer part (Ctrl+J) and grab the Free Transform Tool (Ctrl+T). Strech the forehead by selecting the middle square and drag it upward. Merge layers (Ctrl+E) (See middle image below).
Draw facial lines on a new layer using the Brush Tool (B). These lines can be used for detail. Select the lines on the layer and go to Blending Options. In this new window, go to Bevel and Emboss. Use the standard settings but change: Style: Pillow Emboss. I used these values:- Depth: 51%
- Size: 1px
- Soften: 1px
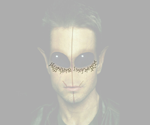
- Create a new layer (Ctrl+Shift+N). Draw some veins around the eyes using the Brush Tools (B). I used a brush size of 2 pixels (See left image below). Select the content of the veins layer by Ctrl+Click on the image of the layer. Now you should have the veins selected. Select the layer of the face by clicking on it. Now duplicate the selection of the veins (Ctrl+J). You should get a new layer on top of the layer of the face. Delete the layer with the veins that you drew. Now go back to the layer with the outer lines of the veins. Give them color by opening the Color Balance (Ctrl+B). Play around untill you're satisfied with the colors. Give the layer Soft light or Hard Light to give it more effect. Merge all layers back together (Ctrl+E). Open up Color Balance (Ctrl+B) again and play with the full colors of the image (See right image below).
- Repeat the previous step, but now create some veins on the head (See left image below).
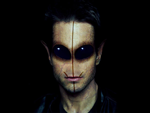
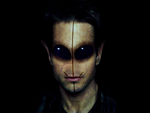
- Adjust the levels of the image by opening the Levels panel (Ctrl+L). Change the levels of the image untill you have a nice, realistic looking face.
Some people in the comments reported that this tutorial is a copy of one that is posted on worth1000. I checked out the tutorial and I have to admit: It does look-a-like, but it's not a copy. Furthermore, the tutorial on Worth1000 is way much harder and more for professional than this one.






Tidak ada komentar:
Posting Komentar