 Cpotorac
Member since:
Aug 2010
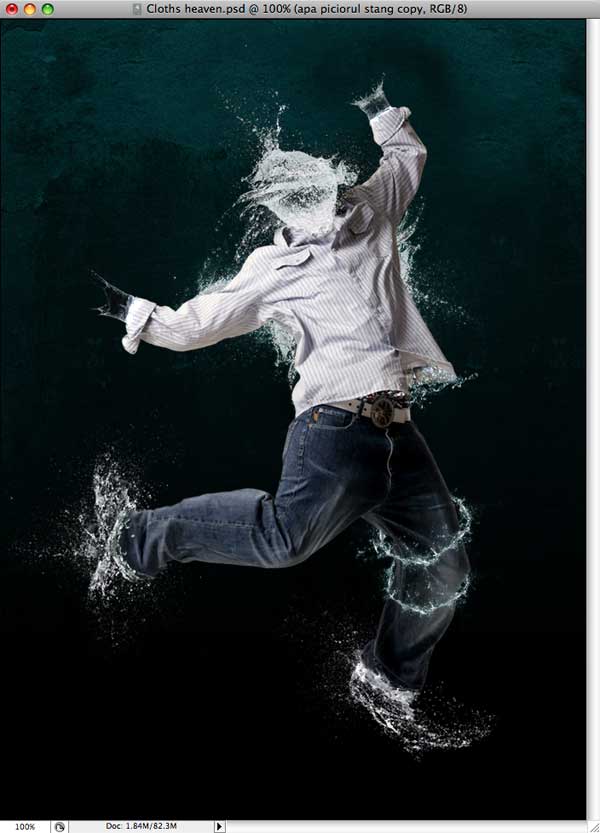
I have seen something really interesting on the net a few days that was made by Nik Ainley but I found the tutorial too small. So here is a more detailed one for those who think of using this great technique.
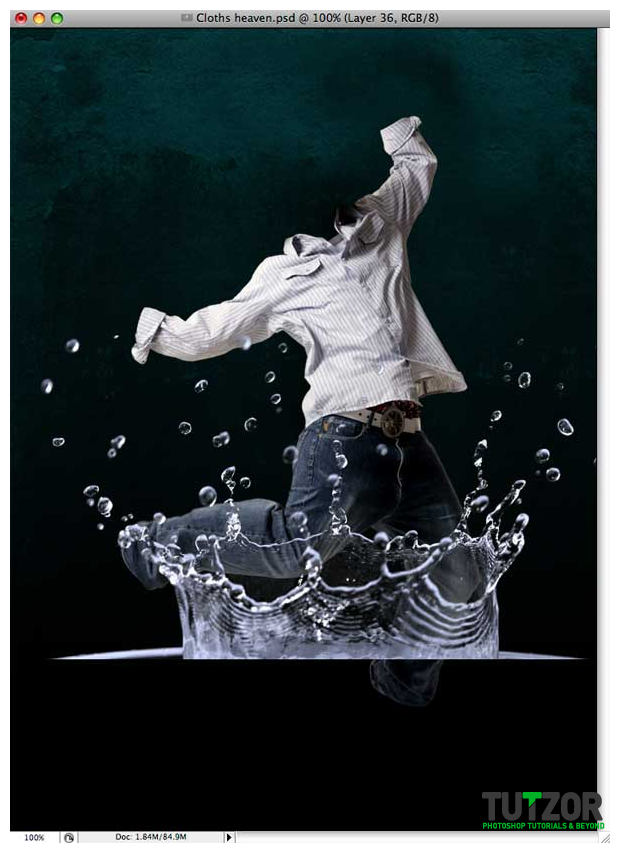
Final Image

Step
01
CpotoracMember since:
Aug 2010
First of all you need your image. I found my image on sxc.hu. There a ton of free images there so keep on searching. Here are a few: http://www.sxc.hu/photo/956170, http://www.sxc.hu/photo/829826, http://www.sxc.hu/photo/604619 and I also bought this one from istock: http://www.istockphoto.com/file_closeup/object/3907033_water_splash.php?id=3907033. 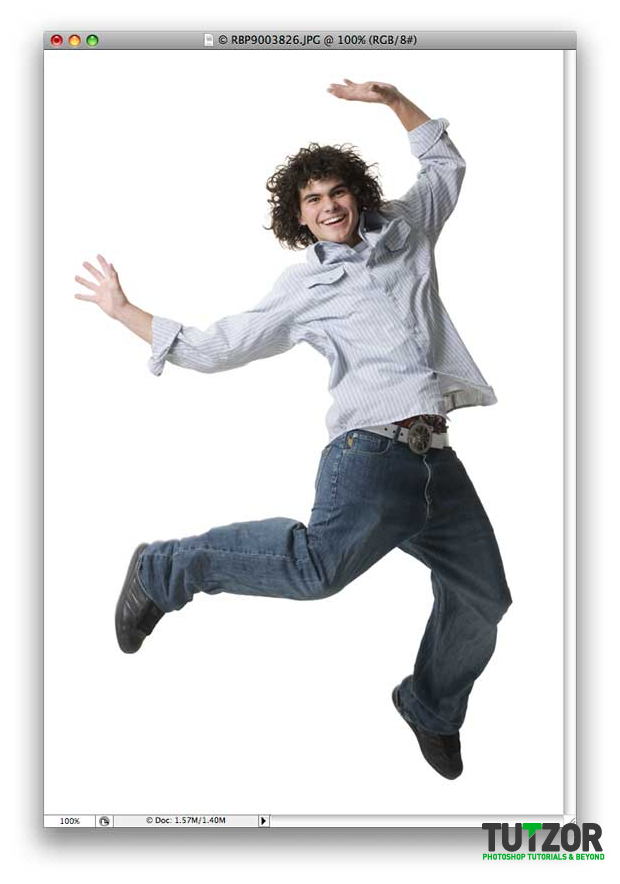
Step
02
CpotoracMember since:
Aug 2010
Next you need to take the man out of that background. Use the Pen Tool for this and draw a path around the guy. Don’t worry about the hair because we don’t need it and the same for the hands and shows. 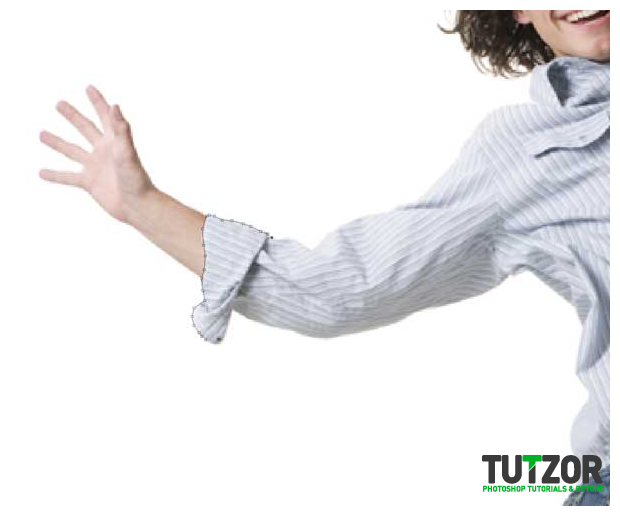
Step
03
CpotoracMember since:
Aug 2010
Now that we have the path around him press Ctrl + Enter (Command + Return on a Mac) and that will select the man. Now open up a new document. This will be the final file. Fill it with black. After you open up the new document move the selected man on that new document by dragging it on the workspace. It should look like this. 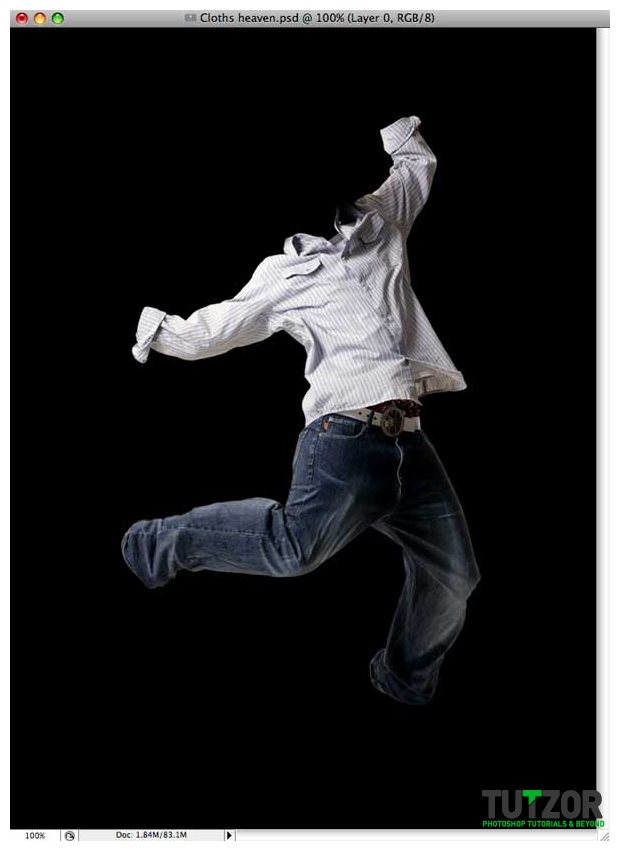
Step
04
CpotoracMember since:
Aug 2010
Next I want to bring a nice background for this because I want to finish with the easy stuff before we start. I have used a texture and applied a gradient over it. Also textures can be used for free from the same site I mentioned before. 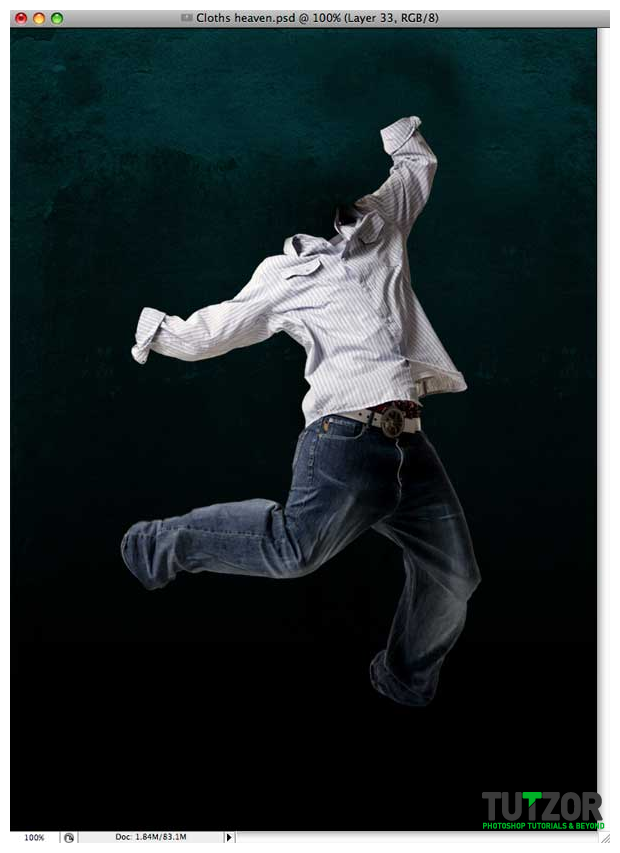
Step
05
CpotoracMember since:
Aug 2010
It is time to make the water effect. First you need to find your images of water splashes. There are a ton of them. I reccomend you look for those images that are very clear and have a nice water splash. Also you need to find lots of them. I found the ones I used on free stock images like sxc.hu or fotolia.com. 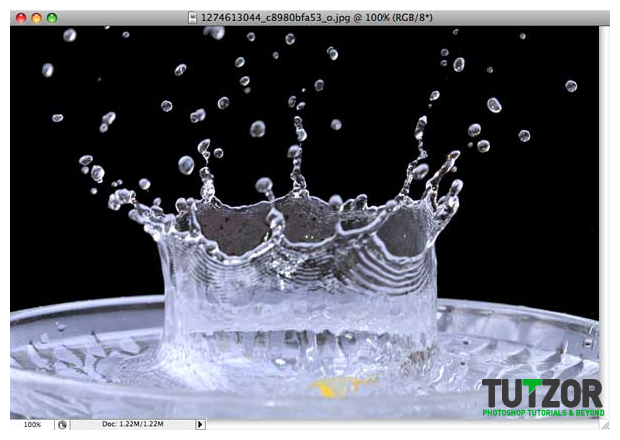
Step
06
CpotoracMember since:
Aug 2010
Next cut the part of the image you don’t want. 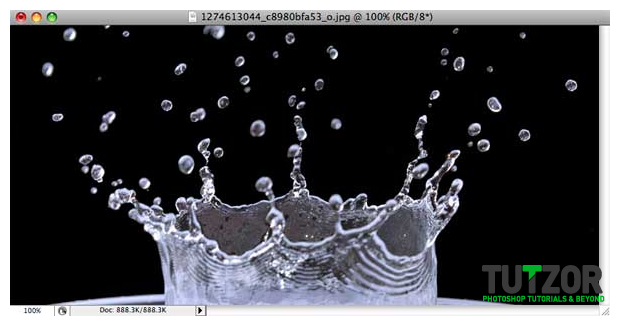
Step
07
CpotoracMember since:
Aug 2010
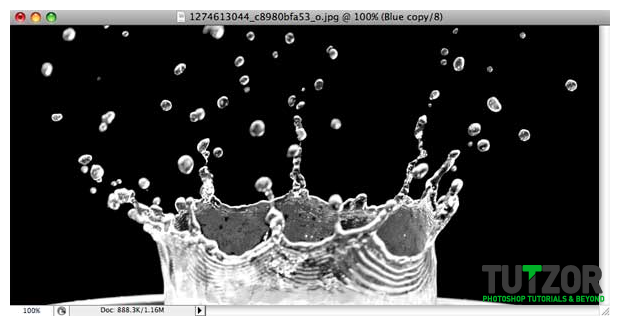
Go to the channels of the image and select the channel you consider that has the best contrast between the splash and the background. Next duplicate this channel, make it visible and make the Blue channel (in my condition) invisible by pressing the eye icon. 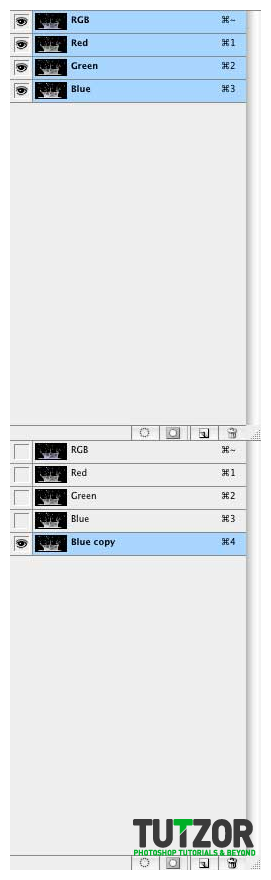
Step
08
CpotoracMember since:
Aug 2010
Now go to Image – Adjustments – Curves. In this case we have nothing to change for the image but there are a lot of images where the contrast between the water and background is not that visible. 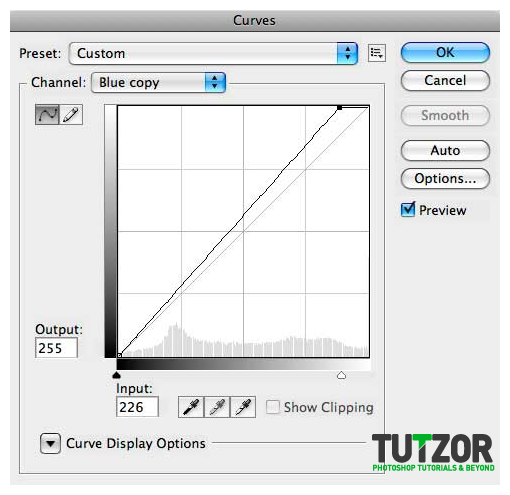
Step
09
CpotoracMember since:
Aug 2010
Now Ctrl + Click on the channel you just duplicated. This will make a selection around the water splash. 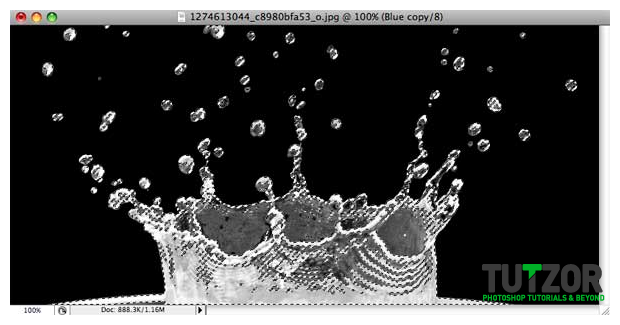
Step
10
CpotoracMember since:
Aug 2010
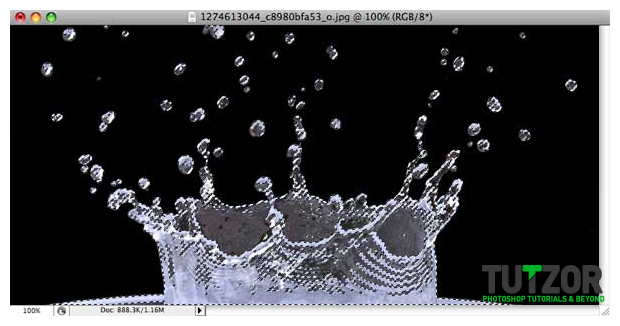
Now select the RGB channel by clicking on it’s thumbnail and go to the layers palette. And click Ctrl + J to copy the selection to a new layer. After you do this drag the copy of the splash to your workplace. 
Step
11
CpotoracMember since:
Aug 2010
As you can see the water is transparent. I will use this on the right hand. What you need to do now is to resize it so that will look good over the right hand. 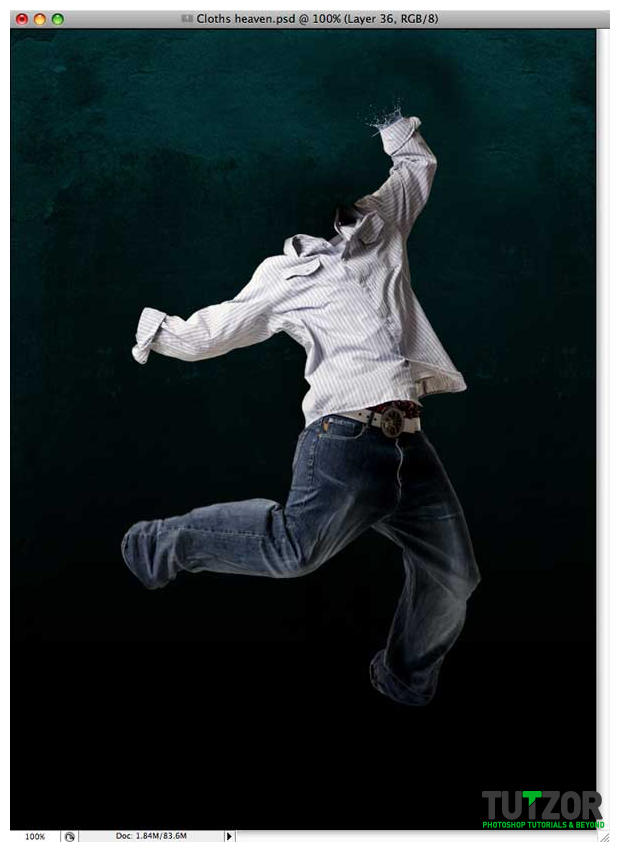
Step
12
CpotoracMember since:
Aug 2010
As you can see it does not look that good and it needs some retouching. First move the layer in the back of the boy and activate the layer mask for this splash and brush away the parts of the splash we don’t need. 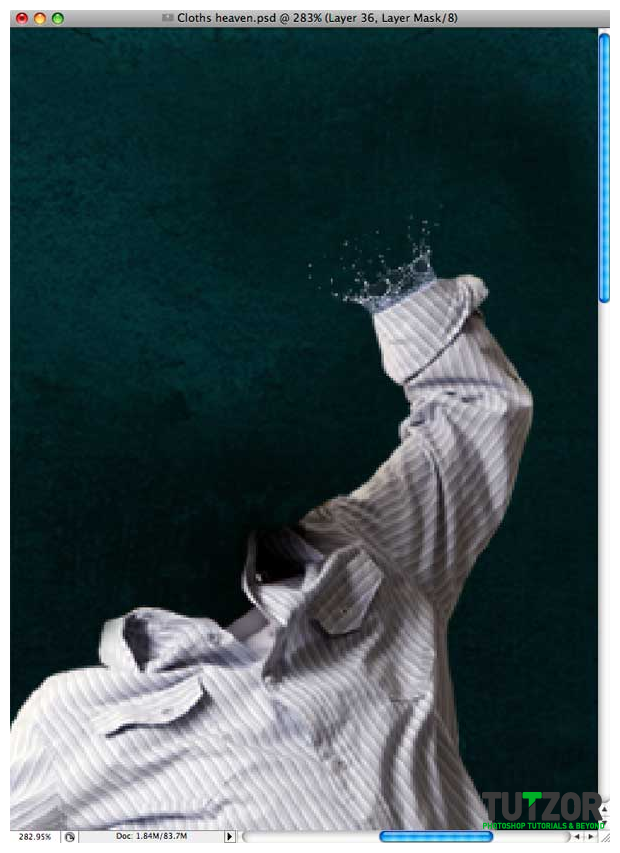
Step
13
CpotoracMember since:
Aug 2010
This looks real great… I know. But I would like to make it little bigger. Or long. To do this just duplicate the splash 2 time, and mask away the part that splits. Here is what I mean: 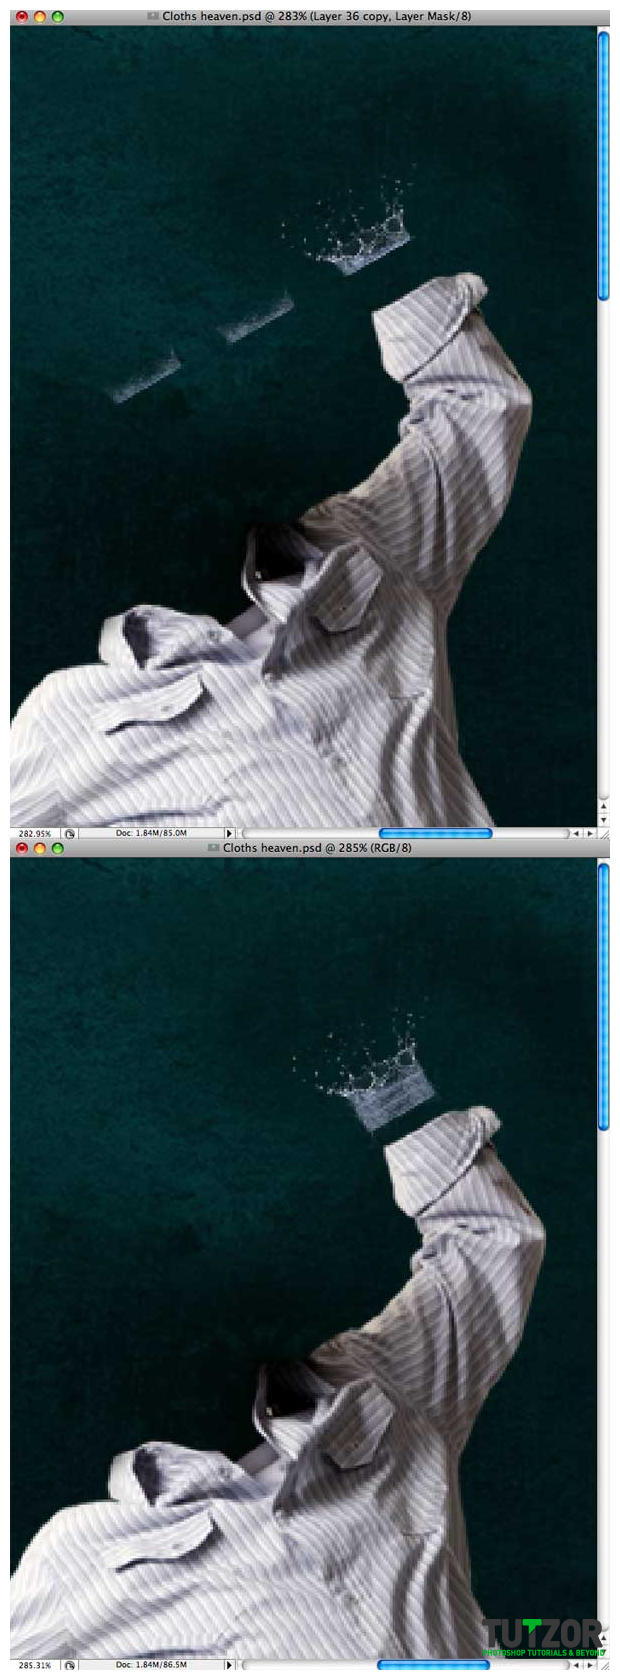
Step
14
CpotoracMember since:
Aug 2010
Next you can merge the layers together and try to get away that blue look of the water. To do this play with the settings of the Color Balance till you get it to look white and something like this: 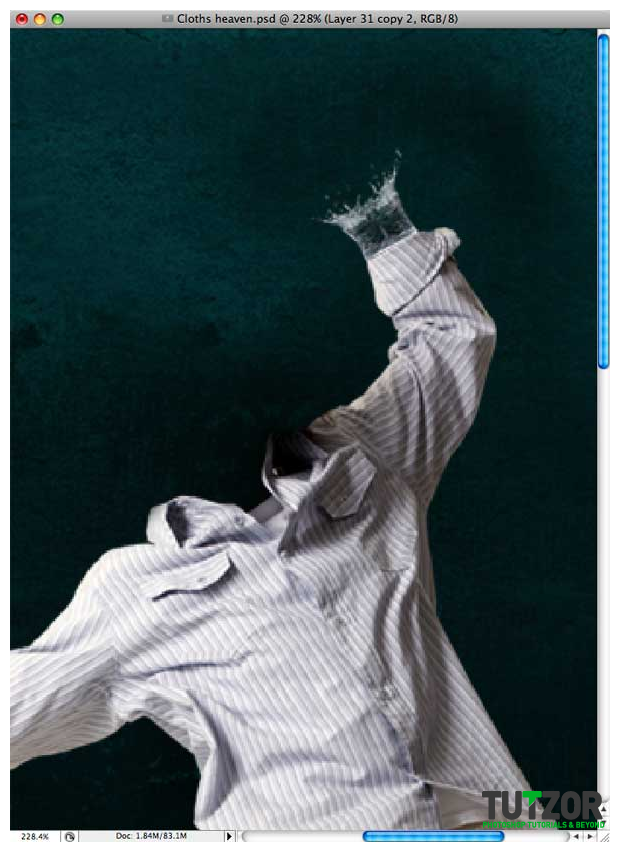
Step
15
CpotoracMember since:
Aug 2010
Now make the other hand. Same technique and same steps I used. You can use the same image but I thought I would use a different one and the lower part of the first one. Here is how I did this hand: 
Step
16
CpotoracMember since:
Aug 2010
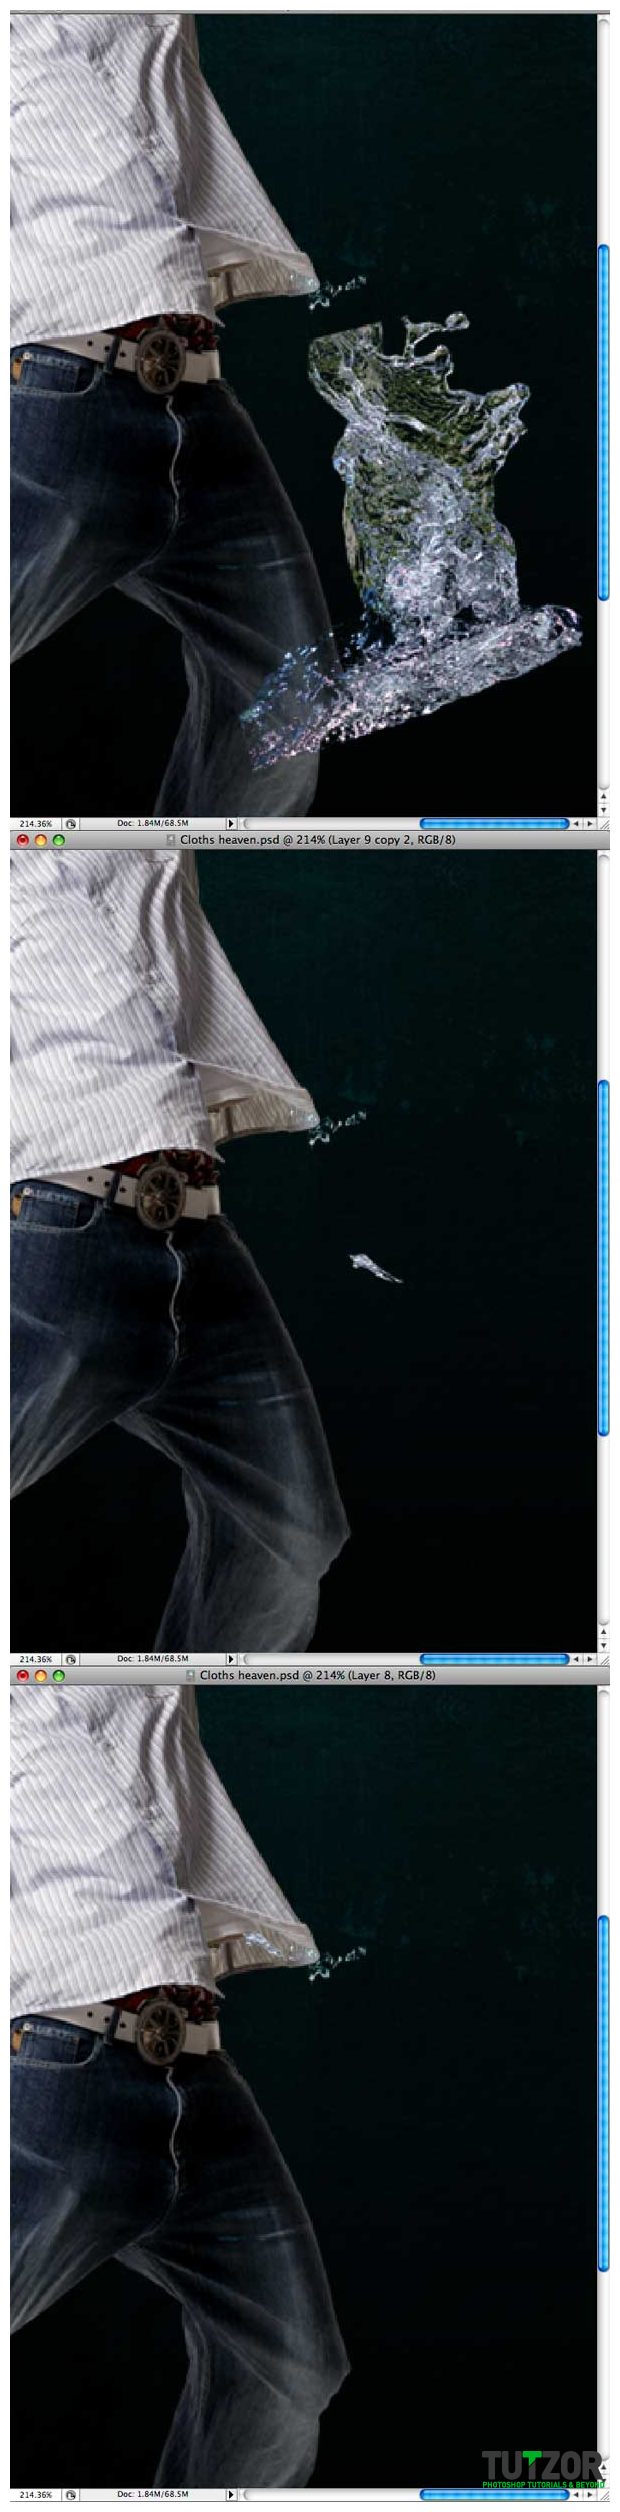
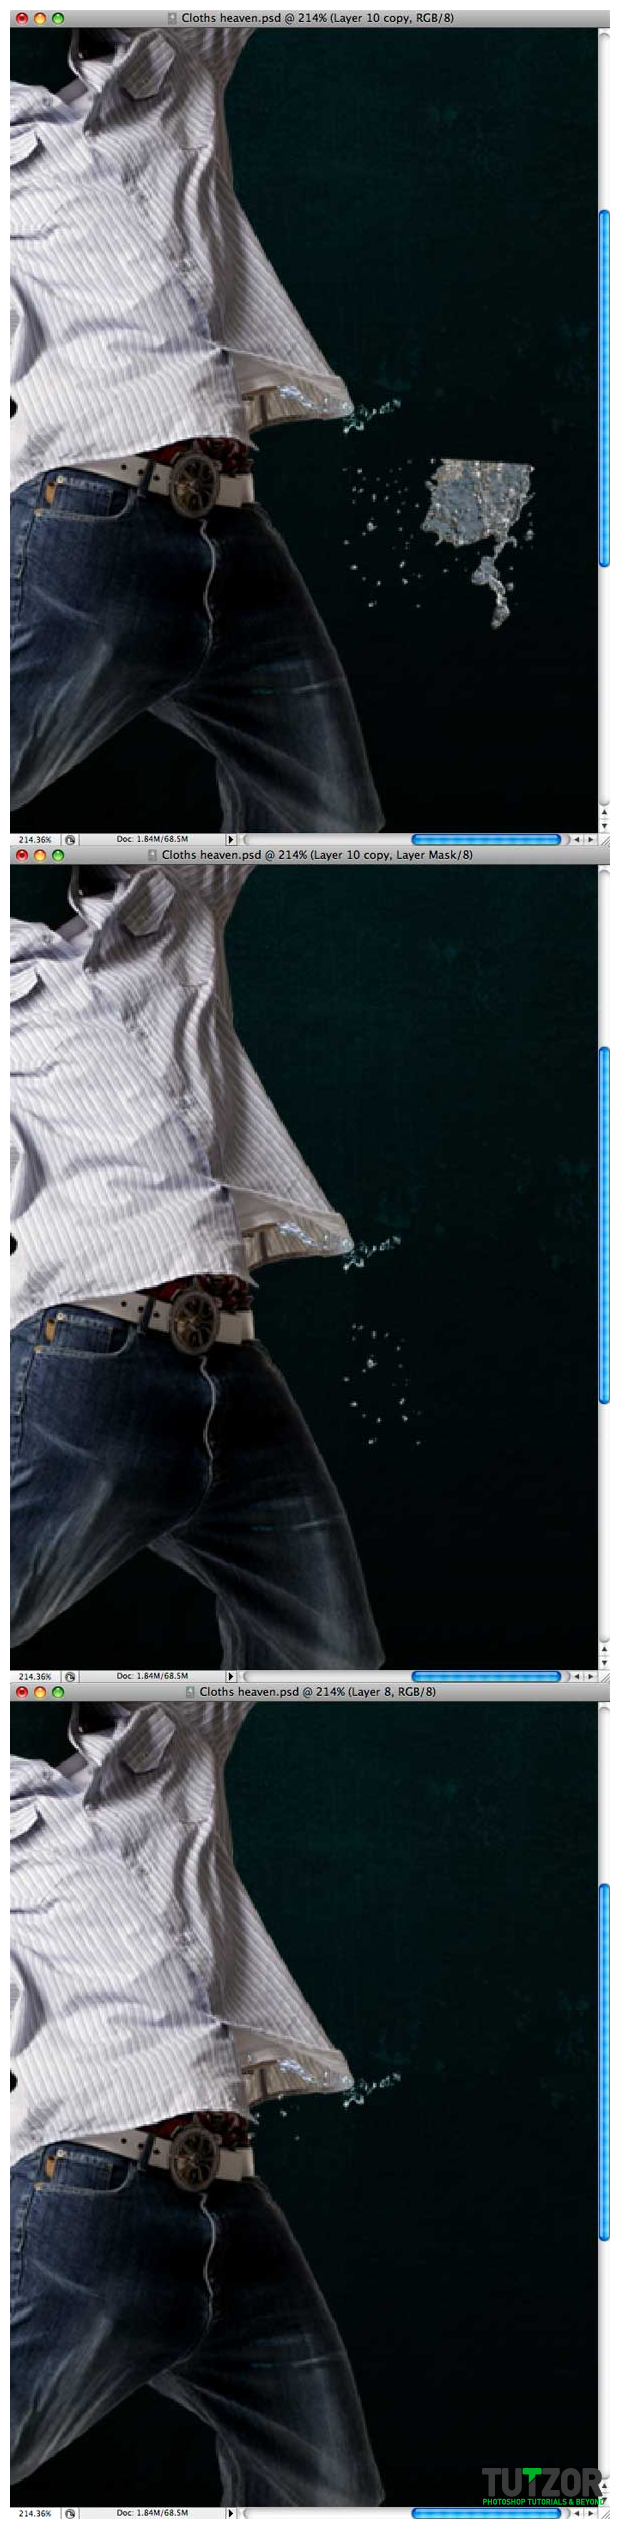
It is time to make the bottom of the boy next. This time use a splashier water image. Also don’t use just one image. Use more. And again same technique. You will also need to move these splashy images that you will create on top of the guy layer. They will not be over the shirt because you will carefully mask them till you get something like this: 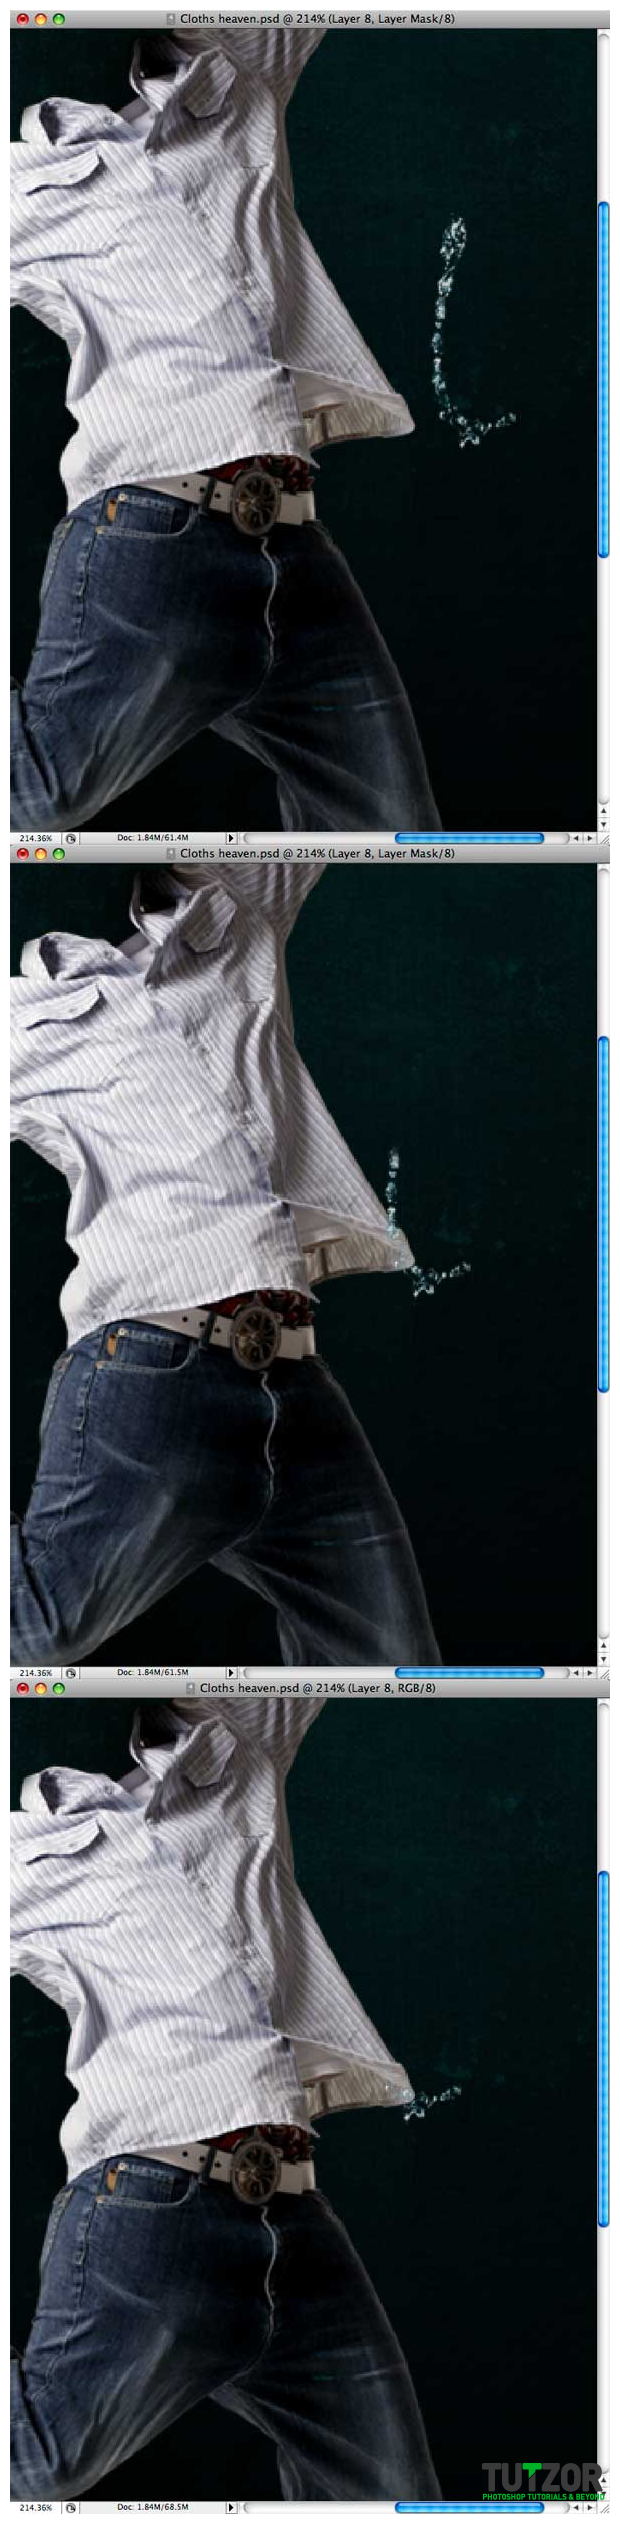

Step
17
CpotoracMember since:
Aug 2010
Next are the legs. Again use the same technique. I will show you images after each change. First is the left leg. 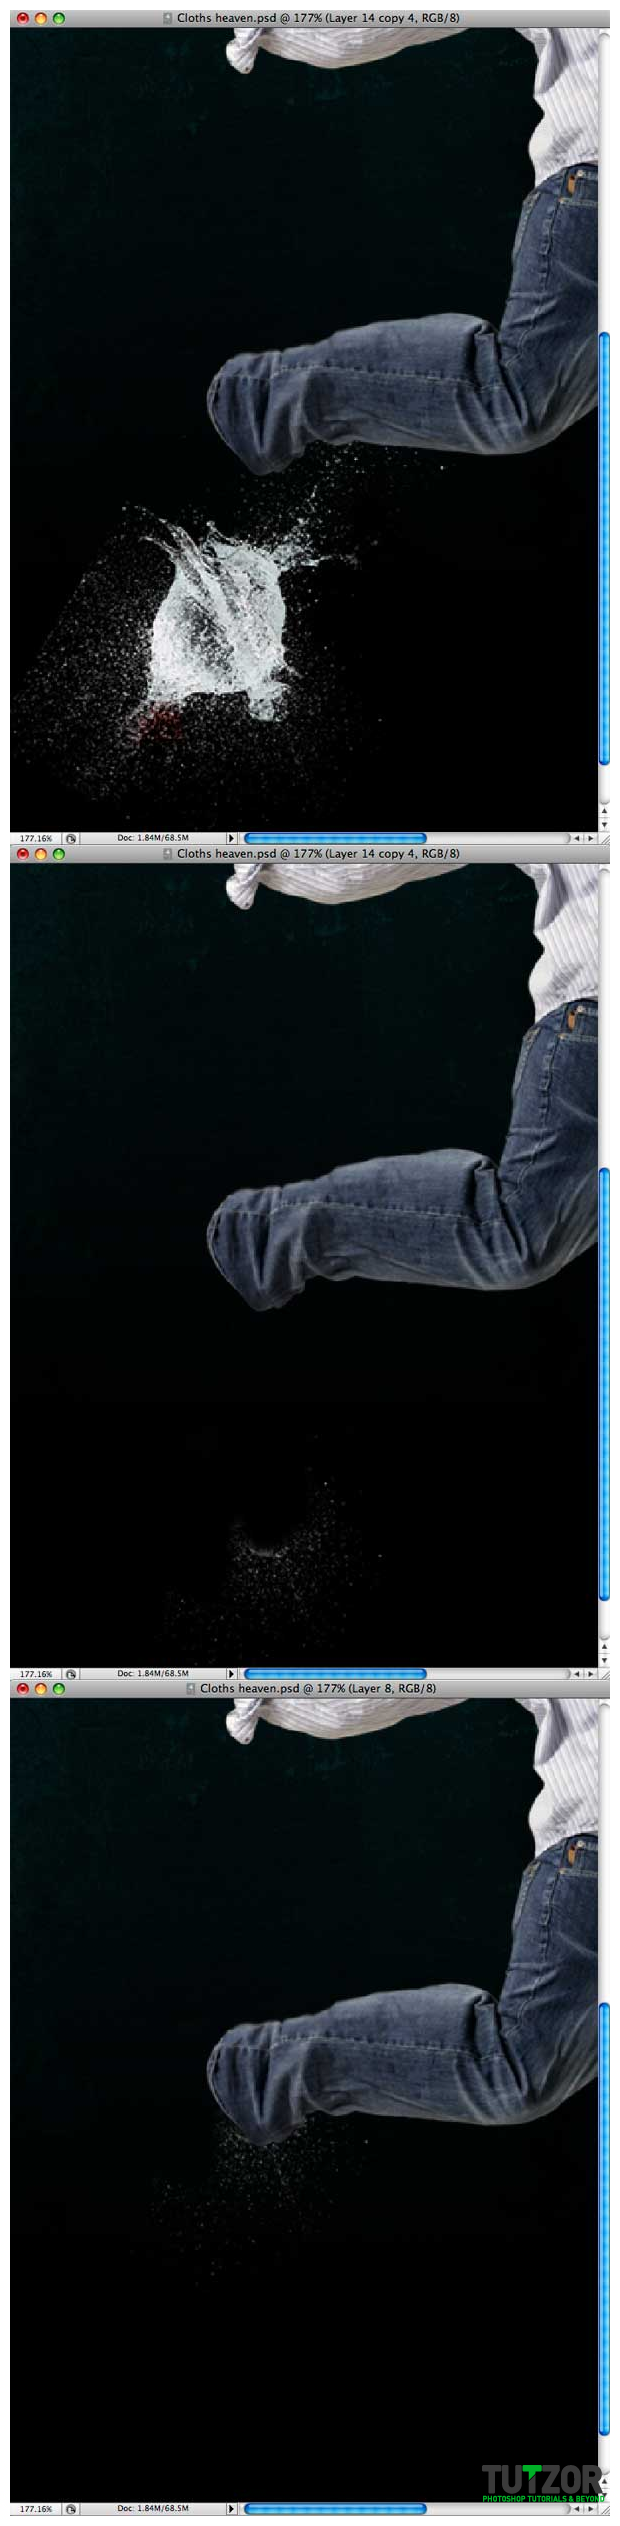

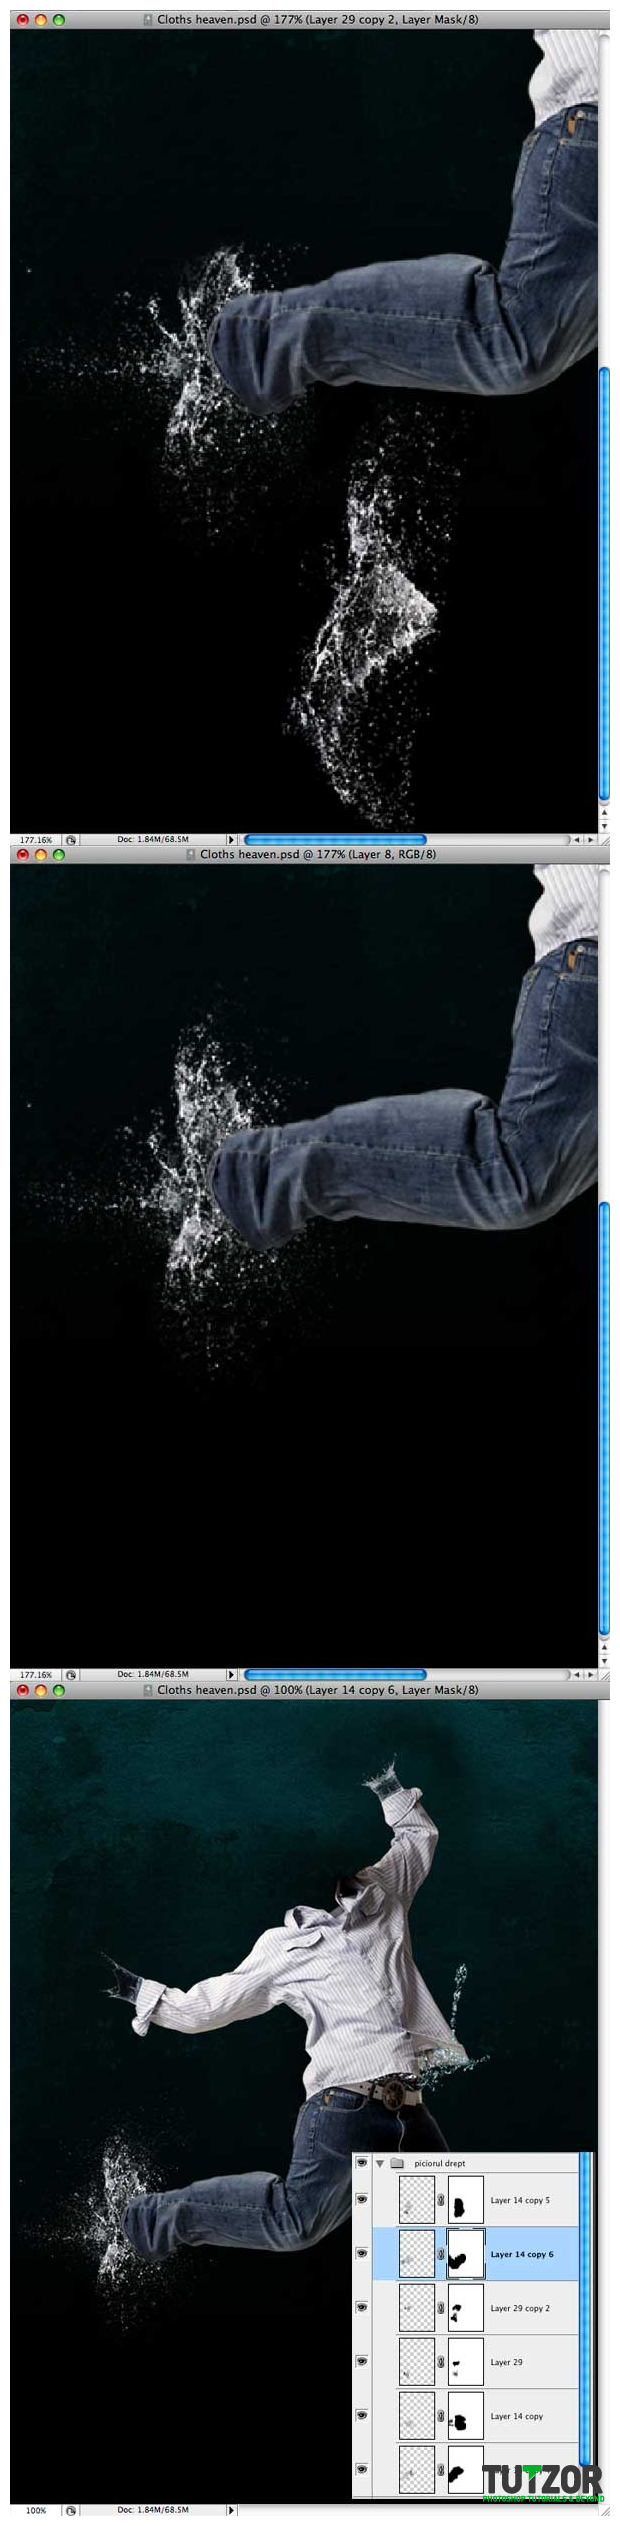
Step
18
CpotoracMember since:
Aug 2010
Now the right leg. Use the same images as we used for the left leg. 
Step
19
CpotoracMember since:
Aug 2010
Next is the head. Remember that I only used water images. No effects or 3D stuff. Also the head is a simple image of a balloon getting blown with a dart. 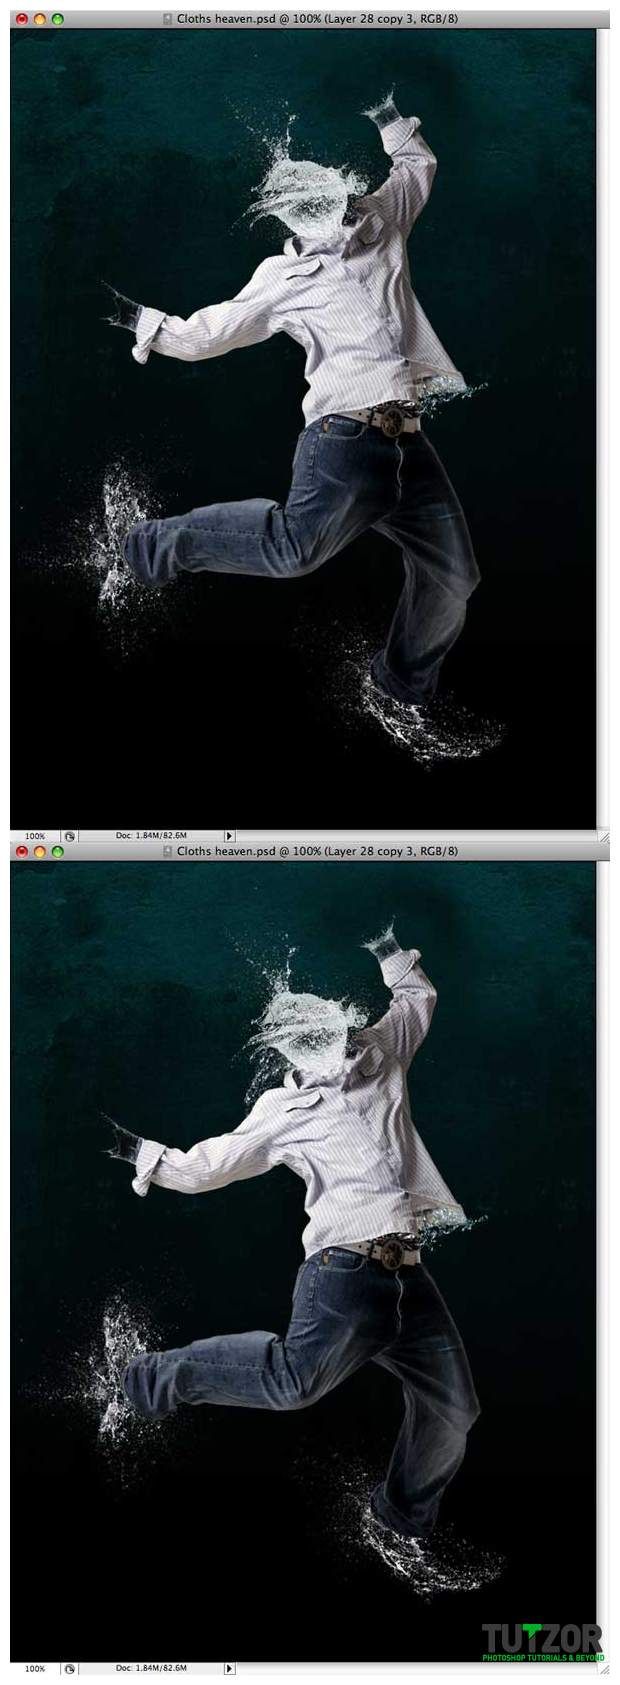
Step
20
CpotoracMember since:
Aug 2010
Congratulations. You managed to make this effect. Here is a bonus that will make this work look better. Just a few retouches and some more splashes behind the object you are trying to apply the effect to and we are done. 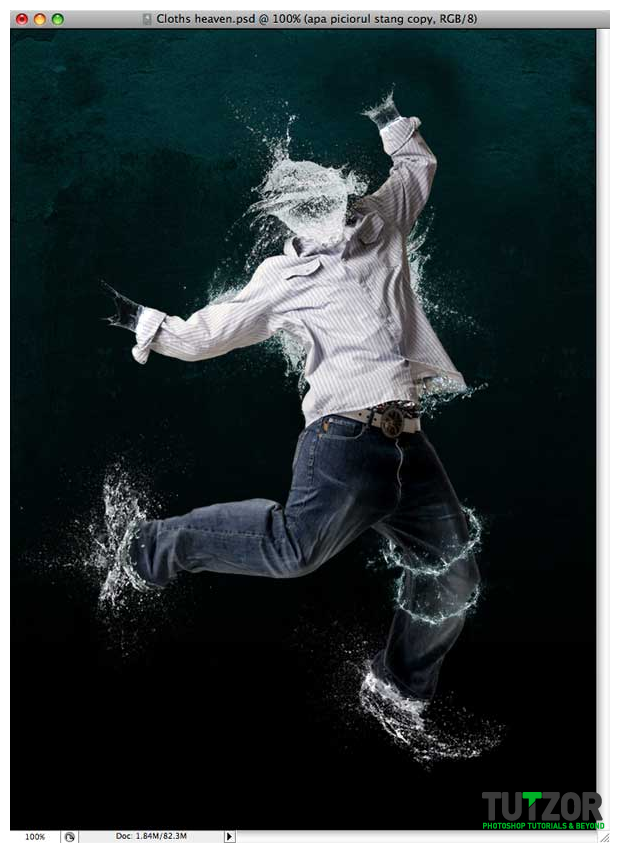
Tidak ada komentar:
Posting Komentar